![]()

Theres no denying the allure and glamour of long, voluminous hair. While trendy cuts and styles come and go with the seasons, lengthy locks are a mainstay in the world of hair trends. That being said, all that hair comes with its own set of complications and required care. What if I just want to dabble in length and volume for, say, a big night out?
Its no secret: Nearly all of our best-tressed celeb favorites have rocked extensions at one point or another. But without endless funds and a professional by your side, extensions have long felt unattainable and impracticable for the rest of us. Enter clip-ins: pre-clipped strips of extensions that snap right onto sections of your real hair at the root to transform your look in a matter of mere minutes.
Clip-ins are the perfect way to up your hair game; they provide serious versatility while being easy to use and reusable (a good set of clip-ins can last years). Intrigued? So was I.
After much research and consultation, I got myself a set of Seamless Clip-Ins from approved brand Hidden Crown. I called up a pro—celebrity hairstylist Laura Rugetti—and got to work.Read on for everything you need to know about applying clip-in hair extensions all on your own.
Assess Your Set

Hidden Crown Crown Clip-ins in Light Ash Brown With Golden Highlights #5/24 $199.00

No two clip-in sets are alike, so lay all your pieces out before you begin and strategize where they’ll go. In my case, I had five clip-ins in total—two thin ones, two wider clips, and one large. Rugetti suggested I use the two thinner pieces for the sides of my hair, the wider ones in the lower back of my head, and the larger one just below the crown of my head.
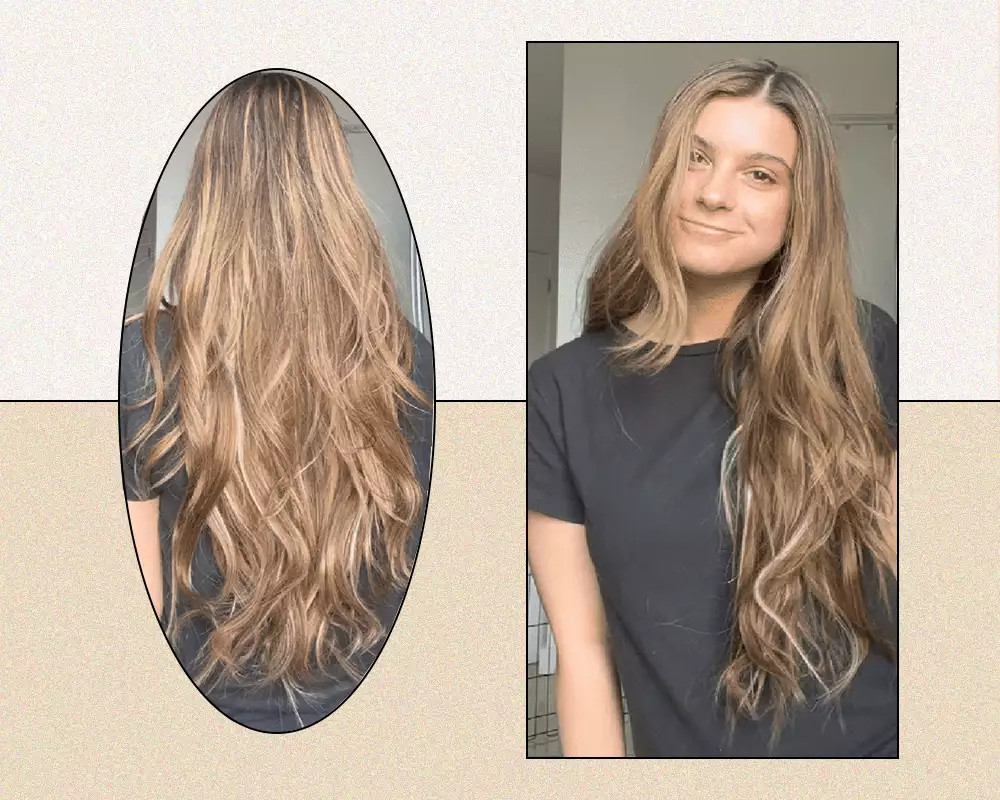
By the way, if you were curious, my extensions were in shade #5/24, which is described as light ash brown with golden highlights. While they looked a bit light in the packaging, youll see they blend in pretty seamlessly.
Prep Hair
Brush through your hair and bring out your tools. You’ll need:
The extension piecesHairsprayA clip or twoA mirrorA rat tail comb
If you have one, a second mirror can be helpful for working at the back of your head.
Section Off Hair

Use the back end of a rat tail comb to section off your hair in a line from the middle of the ear all the way back to the middle of the cranium. It’s important to keep the line as straight as possible, so an extra mirror can really come in handy here. Clip up the above section to separate it from the rest of the hair and repeat on the other side. You can also clip the below sections aside to keep things clean and simple.
For quicker, easier results, Rugetti suggests placing a finger behind the middle of the ear on either side of the head and tracing along the scalp in a straight line until the two fingers meet. Separate the hair above the fingers and secure it with a clip.
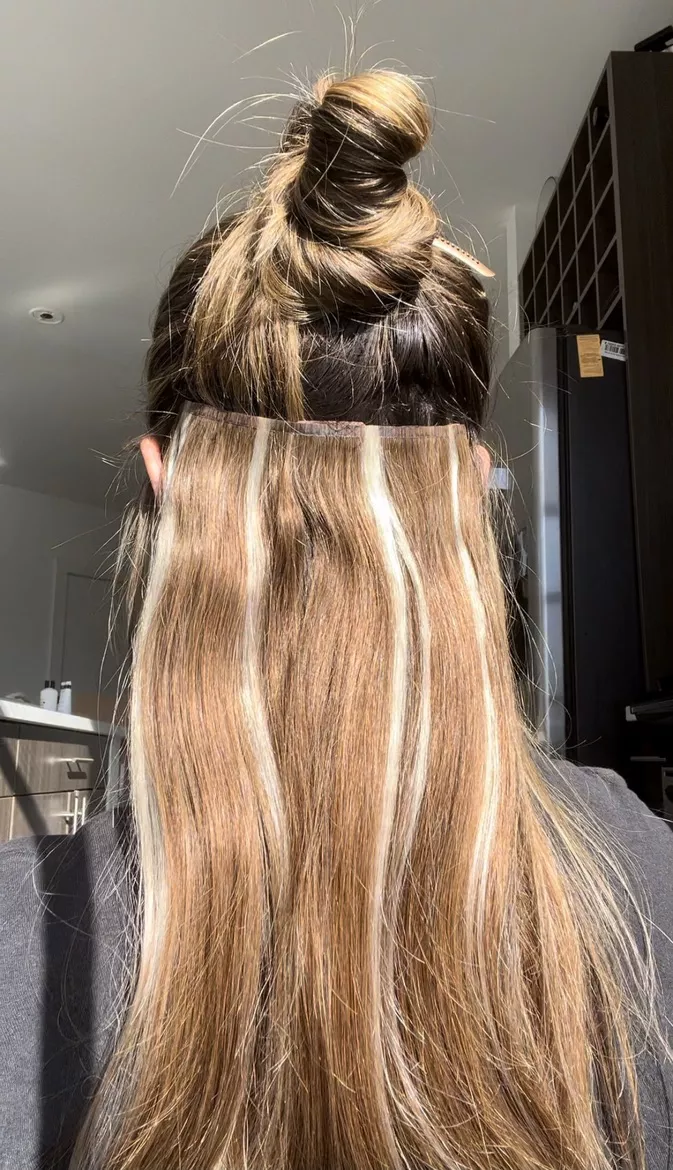
Apply Mid-Sized Clip-In

Hold one of the mid-sized extension pieces up to the part you just created to figure out where it should go. It should be centered without overlapping the ears. Brush through the below section in that area and then tease at the root to help keep the extensions stable. Lightly spray the teased area with hairspray.
Make sure all clips on the extension are open. Spray a little bit of hairspray on each open clip. Then, holding the extension piece on either end, bring it towards the back of your head and feel around for the part you made before. Dig in and attach the middle clip first. Once it’s secure, bring your hands back to the ends of the piece and pull it taut before scooping the two outer clips into the sides of the section and closing the clips.
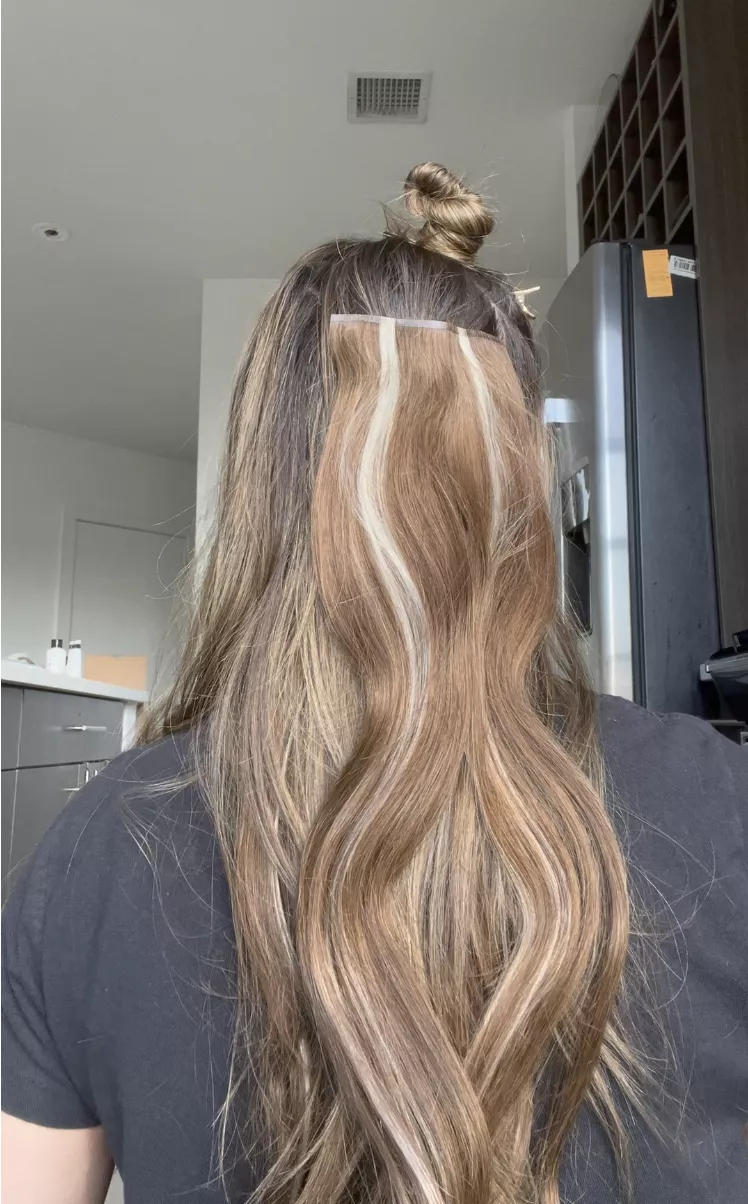
Re-Section and Prep Hair for Second Clip-In

Resection your hair about two inches above the clip-in piece. This should be roughly around the area of the tip of your ears and your temples. Youll want to make as straight a line as possible and to make sure the first extension is completely covered by a layer of hair.
Apply Second Mid-Sized Clip-In
Taking your second mid-sized clip-in, hold it up to your new part to find the best placement. Again, you want it centered without overlapping the ears. Brush through the section, tease at the root, and lightly spray with hairspray.
With all clips on the extension open, spray each one before applying. Like before, you want to bring the extension to the back of your head, holding the extension on either end. Once you’ve found the optimal placement (these clips should not overlap with the previous ones), dig in and attach the middle clip first. Once secure, bring your hands back to the ends of the piece and pull it taut before scooping the two outer clips into the sides of the section and closing the clips.
Re-Section and Prep Hair for Large Clip-In

Release hair from the clip. Create a new part about an inch above the last one, making sure to pick a spot that has enough hair above it to completely cover the extension. Clip the top half back up.
Apply Largest Clip-In

Taking your largest clip-in, hold it up to find the best placement. It should sit centered around your crown without getting too close to the sides. Brush through the section, tease at the root, and lightly spray with hairspray.
With all clips on the extension open, spray each one before applying. Like before, you want to bring the extension to the back of your head, holding the extension on either end. Since this piece has four clips, dig in and attach the middle two clips first. Once secure, bring your hands back to the ends of the piece and pull it taut before scooping the two outer clips into the sides of the section and closing the clips.
Let Down All Hair
Release the above clip and gently brush through the top section. In the back, make sure none of the hairs on top are attached to any wefts. If so, readjust as needed. A handheld mirror comes in handy here, to make sure the extensions are completely covered. This is a great time to fix any mistakes before you have a complete set in.
Section and Prepare Hair on One Side
Following back from the middle of the eyebrow, part hair on one side of the head. Like before, you want as straight a line as possible, with enough hair on top to completely cover an extension piece.
Apply Small Clip-In
Taking one of the small clip-in, hold it up to find the best placement. This can be a bit more difficult than the previous placements since you need to make sure the extension is far enough back that it blends seamlessly with the rest of the hair, but you want to avoid overlapping with the middle pieces too much. This meant I had to place the side piece slightly further back than anticipated. Brush through the section, tease at the root, and lightly spray with hairspray.
With all clips on the extension open, spray each one before applying. Bring the extension to where you’d like it to sit, holding it tightly on either end. This piece only has two clips, so simply pull taut and secure one at a time.
Section Hair and Apply Final Clip-In on the Other Side
Repeat steps 10 and 11 on the other side of the head.
Let Down Hair and Touch Up as Needed

Let down your hair and fix it as needed. As you can see below, I had a bit of a snag at the top center of the head. To fix this, I just unclipped the problem area and carefully removed the top part of the hair caught in it.
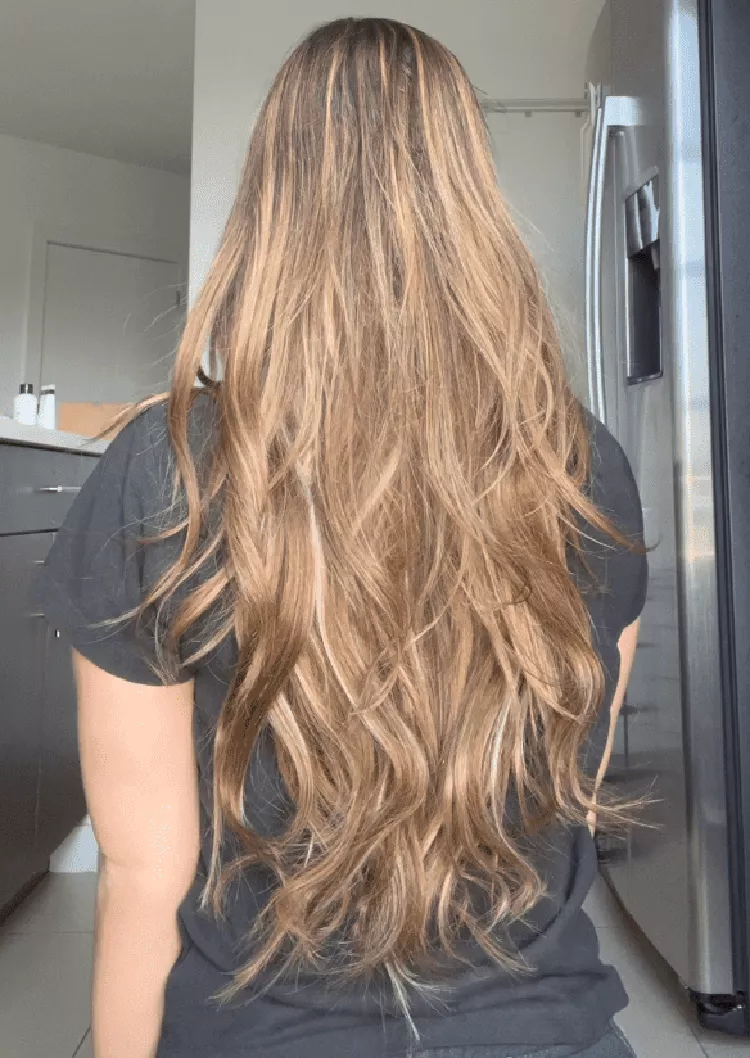
Style As Needed and Enjoy!
Once any problem areas have been fixed, gently brush through the hair with your fingers to help blend the extensions and hair together. From here, you can style both the extensions and your hair as you’d like if you haven’t done so already (straighten, curl, etc.). According to Rugetti, styling before applying extensions or after both work—it’s simply up to personal preference.
The 9 Best Tape-In Extensions That Won’t Damage Your Own Hair
Related Posts

TikToks Viral Butterfly Cut Is This Generations "The Rachel"

11 of the Best Hairstyles For Starting Locs
28 Short Hair Ponytail Hairstyles to Try

How to Curl Your Hair for Long-Lasting Curls, According to Stylists
15 Curly Braid Hairstyles That Put a Fun Spin on the Look